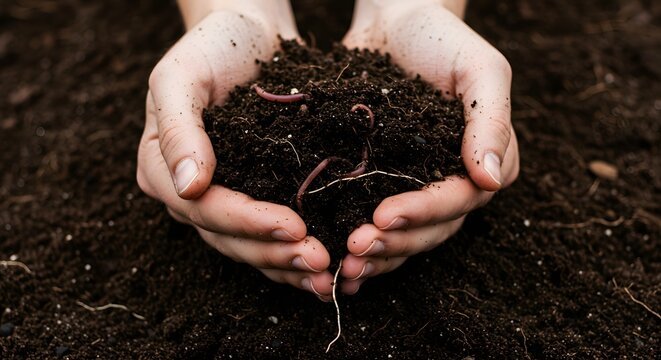
Vermicompost
Vermicompost (worm poop) is unsurpassed as an organic soil builder, as it contains extraordinary beneficial microbial diversity. This makes it ideal for supporting soil ecosystems and thus increasing soil health and plant health.
What is Vermicompost?
Vermicompost is unsurpassed as an organic soil builder, as it contains extraordinary beneficial microbial diversity with 10,000 to 50,000 bacterial species and 500 to 1,000 fungal species. This makes it ideal for supporting soil ecosystems and thus increasing soil health and plant health. Vermicompost should not really be considered a direct fertilizer, as the levels of key nutrients are low, but should be considered a fertility booster. The best analogy I have is that of probiotics. If your key nutrients such as phosphorus, nitrogen, potassium, etc… are raw materials (prebiotic), then vermicompost helps break down the raw materials and makes them more accessible to plant root networks (probiotic). For best results, use vermicompost in conjunction with organic fertilizers. Ideally, this also means less fertilizer will be needed to accomplish the same effect for your plants, as the soil is facilitating a more efficient use of those nutrients. This also means that vermicompost is safe for the roots of your plants to come in contact with and cannot burn them.
Our vermicompost is produced with approximately 300,000 red wiggler worms, which are only fed organic produce. This system is a crucial piece of how we keep our soil fertility on the farm, as anything that doesn’t get eaten can go back into the soil in the form of this highly microbially active compost that helps us grow more and keep the farm’s ecosystem thriving.
Using Vermicompost
Our 1 quart bags of vermicompost can be used directly to cover:
200 transplants, using approximately 1 teaspoon placed in the hole underneath the transplant.
200 sq.ft. of annuals, which can be broadcasted evenly across the growing space, but will be most effective if it is as close to the roots as possible.
400 sq.ft. of perennials, which should be placed in a thin layer directly at the base of the plant, but can be broadcasted across the growing space.
Alternatively, it can be used as compost tea to make:
100 gallons of tea which can be used to give your plants a drink. This is most effective when watering at the base of the plant, but will not harm your plant if sprayed on the foliage.
Why Compost Tea and How to Make It
Compost tea allows you to cover more ground with your compost and vermicompost and apply all those beneficial microbes all year round. The principle behind compost tea is to give the microbes a favorable water based environment in which to grow and multiply. This allows you to take the very beneficial and bioactive compost and extract that life into the water, then multiply it.
To make compost tea, you will need a five gallon bucket, a small aquarium pump, and (preferably) some cheese cloth. You can do this process without using cheese cloth to make a tea bag, but you will want to make sure to protect your pump and strain your tea afterwards.
Into the cheese cloth put a heaping ⅓ cup of vermicompost and 1 cup of good compost. This can be done with just vermicompost, use around a ½ cup, it just wont go as far. Tie this makeshift tea bag up with twine or other securement and submerge in your five gallon bucket filled with water. If your tea bag does not stay submerged, you may need to help it with a small rock. Next put in your aquarium pump, turn it on, and allow it to bubble your tea for 24 hours. This is temperature dependent, as your microbes will multiply slower in colder temperatures. So, in the summer it will usually only take 24 hours, when the days start getting colder it can take as much as 72 hours.
Using this base recipe you can start adding all sorts of things to your compost tea. The most common additive is going to be molasses (approximately 1.5 ounces per 5 gallons), added directly into the water while the pump is running. This will give your microbes lots of food and they will multiply much more rapidly. If adding molasses, make sure to wait a minimum of 30 hours to use the tea. This will ensure all the microbe populations are well balanced.
If you have an herb garden, you can also take advantage of nutrients that your herbs pull up into their foliage to add them into your tea. Try plants like: yarrow, sage, clover, chamomile, nettle, comfrey, or borage. Just crush them up a bit and place them in your tea bag too.
Once you are done brewing your tea and you have turned off your pump, make sure to use it right away; the microbes will not survive in a water solution without oxygen for very long. You can use this tea in a watering can and give all your plants a drink. You can go lighter on the tea than you would if you were watering normally, but don’t be afraid of giving them extra. Everything in the tea bag can get put into your compost pile (if you have one this then acts as a great compost inoculant), buried in your garden (particularly if you used herbs and would like them to break down farther), or spread next to some plants you would like to give a little boost.
*** NOTE: If you are using city water treated with chlorine, fill up your five gallon bucket the day before and let it sit open for 24 hours out of the sun. This will allow all the chlorine to off-gas into the air and not kill the beneficial microbes when you try to make your tea. **
*Recommendation: We love the various sized Compost Tea bubbler systems from TEA LAB


